I was removing some cyclocross tubulars today and (after removing the front tire) I realized that there is a proliferation of information and guides online about gluing tubular tires and about removing glue from tubular rims – but not a lot about actually removing the tires.
So I decided to do something about that!
Some of the reason there is not a lot out there about tubular tire removal is that it really can be pretty simple and the best tool you can have is raw effort. But, it never hurts to apply a few tips along the way, right?
(The photos are large – click for super-size detail view)
Step 1: Where to start –
Give yourself some time; nothing should be done with haste when it comes to tubular tires. If you’re in a hurry to remove them; you’re probably in a hurry to glue them. Gluing “tubi” tires in a hurry results in a garbage glue job and rolled tires.
I like to begin on the opposite side of the wheel from the valve stem and work my way around the wheel using my thumbs to push the tire from the base tape away from the rim.
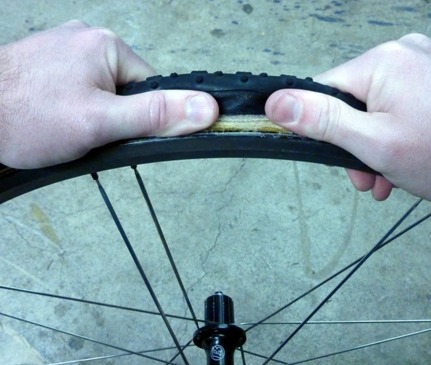
This may partially be habit from removing clincher tires; but it has practical purposes too. The valve acts as an anchor point in the rim and will cause that portion of the tire to resist being pushed away from the rim.
I start at the point furthest away and work in both directions around the wheel, pushing more of the tire away from the rim as I go.
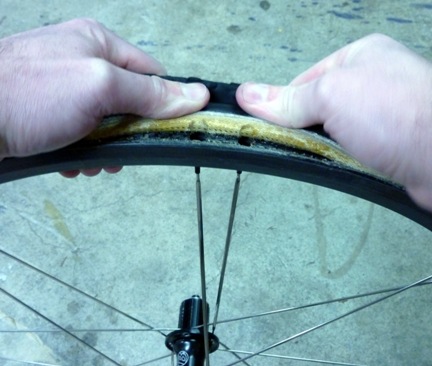
Once you’ve gone all the way around on one side – flip the wheel around and repeat on the other side; starting opposite the valve stem. You should work both sides until only the center portion of the base tape is still glued to the tire bed of the rim.
This may take some real effort and your thumbs and forearms are likely to get tired if you are out of practice. Don’t be afraid to take a break – this isn’t a race
Step 2:
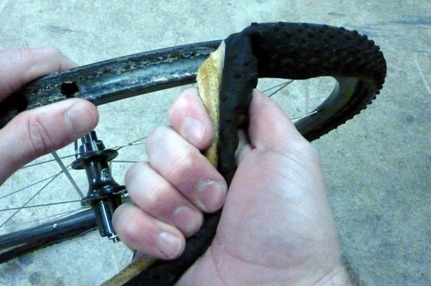
Once you have worked all the way around both sides of the tire and only the center of the tire is still glued to the rim is when the hard work begins. On wheels with spoke holes that go through both walls of the rim; I like to start at a spoke hole. The wheels pictured can occasionally make the job a little easier because of their paired-spoke arrangement – putting two holes in close proximity to each other creates enough of a “weak spot” that it can be easier to pry the tire off the center channel.
Put your body into it if you must – this can be a rather difficult step. Some mechanics may result to a plastic tire lever at this point as a last resort to gain some leverage. Do this with extreme care and I recommend against using metal levers – especially on carbon rims – as you may damage the rim surface.
Step 3: The Finish
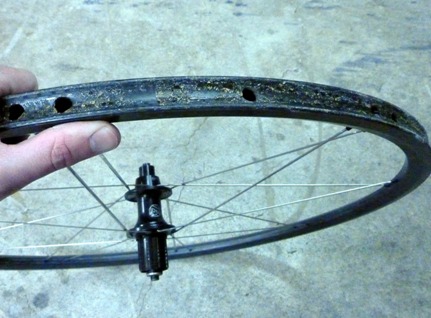
Once you have some of the center channel glue defeated; the rest can come pretty easy.
Often just holding the wheel with one hand and pulling the tire off the rest of the way around will do the trick. Occasionally I find that I have to lean into it a little – but there is often enough of a mechanical advantage here that the glue just “gives up.”
And there you have it – a bare wheel ready to clean and re-glue.
As I said at the top – there is a lot written about cleaning glue from rims – Lennard Zinn having written much of the latest and most definitive info (except I’m still nervous about using a butter knife on carbon rims, Lennard; but you’re more of an expert than I.) But my goal wasn’t to cover cleaning and gluing. Maybe someday; but not today.