Pre-Ride Checklist

“PREPPING” AIN’T JUST FOR ZOMBIE ATTACKS…

 I was preparing for a ride the other day when it occurred to me: there’s a lot of things that I just “do” before a ride without thinking about – however they can be rather crucial to the success and enjoyment of the endeavor. A lot of this ritual are things picked up along my journey as a cyclist from others and some of it is because of experiences I have had and developed a way to prevent disaster on subsequent rides. There’s nothing magical about it; but it is actually a little bit of a ritual. That’s good though as it keeps me from missing a step or forgetting to do something before I head out the door.

All told; while it might seem like a lot of steps – it really only takes probably 10 minutes total ( not sure really – I’m not analytic enough to time myself…). The trick to this or any checklist you might develop for yourself is to make it a routine and you’ll soon find yourself accomplishing everything rather quickly and smoothly. So; here’s the details with some description following so you know why I might do what I do – or when I do it.

You might also note that I allude to some post-ride rituals too…I’ll post some on that that soon; but it’s just as important and can be very quick and easy.

PLAN MY ROUTE: I do this for safety’s sake: so I can tell my wife where I’m going since I ride by myself most of the time.
Sometimes I’m more detailed than others – but even if I just have a general direction in mind; that will let the search party zero in on me faster… 🙂 A quick phone call or text to “file my flight plan” also gives her a good idea of when I’ve left and how long I should be gone. If you’re not letting someone know when you ride by yourself – find someone who cares and start. If something happens to you while riding; this could make a big difference.

GET DRESSED: Sometimes the previous step and this one are intermingled…but that’s beside the point. And, this is a worthwhile step to mention because it’s truly part of the preparation. This is where you consider the conditions you’re riding in and what layers are appropriate and how you’ll address a change: i.e. what you’ll do if it starts raining/snowing or if the temperature changes. Are you taking a jacket and will your jersey accommodate it if you need to take it off? Arm warmers instead of long-sleeved jersey? Do you need reflective clothing in case it gets dark? All worth considering.

Also think about how intense your ride will be: for a mellow or recovery ride you’ll want to dress warmer than you would for the more difficult effort of a training ride since your body temperature will be higher with harder efforts.

Finally: out of respect for my wife and her floors…I leave the shoes off until I step into the garage so I don’t mar things up with my cleats. Continue reading “Pre-Ride Checklist”

Get Road Rage Cycling on your Mobile Device

I just got around to putting the Android operating system on my HP Touchpad tablet (which is a different blog post for a different blog; but anyway); and while downloading new apps I stumbled upon Google Currents; a service that offers free subscriptions to many top publications in one place so you can easily get the news and content that is important to you. With less than 24 hours to play with the app; I have subscribed to way more content than I can ever hope to read!

But it also got me thinking: I wonder how I can use this to make Road Rage Cycling more accessible?
Turns out it is very simple and so I’m happy to introduce: Road Rage Cycling on Google Currents! Now you’ll have access to the blog in a quick to access, mobile-specific format.

The first step is to head to your appropriate app store and download Google Currents for iPhone and iPad or Google Currents for Android. Since I have an iPhone and an Android tablet I have done both and found characteristically easy to do – and free of course. After downloading to your device; a simple set-up screen walks you through the steps which are especially simple if you already have a Google account. The app will sync and you’re all set. Don’t forget to share this with your cycling friends. If we can get to 200 users Google will give me broader distribution – which will be good for all of us since more readers = a better blog.

Currently, I have the latest articles uploaded, but I will be adding previous content in the coming months. New content appears on the app as soon as it publishes to the blog and you won’t miss a thing. So; download Currents and subscribe to Road Rage Cycling  – then you’ll have me with you everywhere you go…  which might sound a little creepy; but it’s not.  Trust me.

Thanks for your loyal readership. I’m looking to do a lot more in the near future and I hope you’ll enjoy!

Bike Term Dictionary

This is a Glossary of sorts I’ve compiled over the years that will be occasionally updated.  Think of it as your Bike Dictionary. Bookmark it and use it often. Don’t know what something means?  Look for it here.  Can’t find it?  Write us or leave a comment and we’ll create a new entry.  We hope this is a great service that we can all keep improving.  Enjoy!
Sorry, I’m not going to even try to keep this in alphabetical order…
Road Bike Terms-
Cadence: The revolutions per minute (rpm) of your cranks as propelled by your legs. Often used as a measure of efficiency (higher cadence is usually deemed more efficient) or as a guide for gear selection.  In road cycling for the last decade, 90 rpm is considered a benchmark cadence.
Compact (double) Crank: The alternative to standard double or triple crankset.  The compact double crankset has two chainrings of smaller diameter than a standard double; usually 50 teeth (50t) and 34 or 36 teeth (34t) instead of 53 and 39 teeth.  This lower and broader range of gears provides a wider variety of ratios and easier climbing gears.  Compared to a traditional triple, a compact offers smoother front shifting and may be lighter; but is commonly geared slightly higher.
Components: Catch-all term for brakes, shifters, derailleurs, gears, chains etc.
105, Ultegra, Dura Ace: These are currently three top-tier levels of Shimano’s road components – Dura Ace being the highest; professional level components.  Since Shimano holds majority market-share for components in the bike industry – these are considered the benchmarks for quality and performance at their given levels.
TT: Short term for Time Trial – an individual “race against the clock” usually involving more aerodynamic equipment than is commonly found in traditional road racing.  Often augmented by ITT (individual time trial) and/or TTT (team time trial).
Sizing: Quick, approximate process to establish an ideal frame size and safe riding position.  Not as detailed as fitting.  Commonly a service given away for free with a new bike (but often referred to as fitting). Think of sizing as going to a clothing boutique and the associate recommending sizes to try on.
Fitting: Detailed analytical process of adjusting a bicycle and the rider’s position on that bicycle to improve comfort, efficiency, power, and reduce likelihood of injury due to repetitive motion. Good fitting services are more like going to a tailor for a suit than anything.  Evaluation of individual physiology, injury history, riding habits, and goals must be a part of the process to insure good results.  Quality fitting services are commonly not found “given away” for free.
Triple (crank): A common crankset on mountain bikes and hybrids, the triple is also found on road touring bikes and many recreational and enthusiast road bikes.  It gets it’s name from the three chainrings found on it; providing a low, medium, and high range of gears.  The smallest, inner-most chainring is often referred to as the “granny-gear” and is your lowest range of gears for climbing.
SIS: Shimano Indexing System.  This is the trademark used to identify Shimano’s indexed shifting system (think of it like pre-set stations on your radio – push the button and it goes there). Indexed shifting is the norm now and replaced “friction” shifting which was more like older style analog radios where you turn the dial until it sounds good.  Friction shifting is still an option, but not easy to find and only somewhat common on time-trial and touring bikes.
BB-30: Bottom Bracket 30 – refers to an open-source standard pioneered by Cannondale and widely accepted in the industry involving a larger 30 mm crank spindle (axle) and similarly oversized bearings which are pressed directly into the frame rather than threaded into the frame as has been the traditional method.  Other standards of oversized bearing/spindle or press-fit bearings exist and are usually not interchangeable.  Examples: BB-90, BB-91, BB-86
Clincher: Now more common than the tubular(sew-up) tire – but this was not always the case.  The clincher tire more closely resembles automobile tires in its formation, involving a “bead” of various materials designed to interface with a “hook” in the clincher rim to old the tire firmly on the rim without adhesives and encase the inner tube.  Clincher tire quality has increased immensely adding performance and reducing weight in the last couple of decades.  It is now the norm for training and amateur racing due to it’s lower cost and ease of maintenance and replacement.
Tubular(sew-up): The same and different.  First: either of these refers to a tire that must be glued or otherwise adhered to a rim as opposed to the now common “clincher” variety.  Sew-up tires are the oldest variety and refer to a tire with an innertube (usually latex) sewn into the body of the tire.  Tubular is the umbrella term covering sew-ups and tires with other construction methods which still must be adhered to the rim surface.  Tubular tire/rim combinations are not interchangeable with clincher tires and rims.  They can often provide lighter weight, better comfort, and better cornering but are also usually more expensive and difficult to install. Tubular tires are difficult to fix when punctured. Tubular tire gluing and installation can have catastrophic results when done wrong and should not be taken lightly.  We recommend installation by a very experienced professional.
MTB Terms
29er: Larger diameter mountain bike wheel standard which has actually been around for quite a while but is finally gaining wide-spread acceptance and support.  Finally popularized by Gary Fisher with his bike brand, these wheels are taller than the standard 26″ wheels traditionally used.  Employing the 700c rim diameter  most commonly found on road, touring, and hybrid bicycles; the 29er is promoted as being a more efficient wheel size for rolling over obstacles and maintaining speed and momentum.  The down sides are often additional weight and reduced agility.
2×10: Newly introduced gearing standard for mountain bikes mirroring a popular road bike standard, pioneered by component manufacturer SRAM and soon after endorsed by Shimano.  The 2×10 involves a gear cluster of 10 cogs on the rear wheel and crankset of 2 chainrings.  Traditionally, mountain bikes have had 3 chainrings and between 7 and 9 cogs.
LX, XT, XTR: These have long been the three top-tier levels of Shimano’s mountain components – XTR being the highest; professional level components.  Since Shimano holds majority market-share for components in the bike industry – these are considered the benchmarks for quality and performance at their given levels.  LX was recently replaced by “SLX”
Sag: Term referring to the movement of the suspension system on a mountain bike when a rider sits on the bike.  Sag is ideal and part of the design parameter, allowing the system to adapt better to the terrain than a system without sag. A suspension system is often designed to have a sag amount of 15-25% of the total travel of the system.
Tubeless: A tire and rim system designed to work without the use of the more common inner tube.  Often involves a sealed rim or rim-strip, special air valve, and tire sealant or special tire which is less air-permeable.  Tubeless systems are becoming more common but are still only found at the higher ends of the product offerings.  They allow the use of lower tire pressures providing better traction and reduced chance of flatting from lower pressure (pinch flats).  The tires can be more difficult to mount on the rims because of the necessity of a tight fit to hold air.  The easiest way to fix a puncture on a tubeless tire system is to install an inner tube – so carry a spare.
UST: Mavic’s tubeless standard “Universal Standard for Tubeless” (http://www.mavic.com/mtb/technologies/UST.1.9405.aspx).  While this system is touted as a “universal standard” it is not necessarily compatible with all tubeless systems.
Compression: Term that refers to a suspension system coming under load and into a compressed state.  Also used to refer to the compression adjustment on a suspension system and controlling how quickly or slowly a system compresses thereby fine-tuning the system to a rider’s weight and riding style.
Rebound: Term that refers to a suspension system returning from it’s loaded, “compression” state to it’s unloaded state.  Also used to refer to rebound adjustment on a suspension system and controlling how quickly or slowly a system rebounds thereby fine-tuning the system to a rider’s weight and riding style.
General Terms
True: Term used to describe a rim’s alignment to itself.  A straight rim is “true”.  A “wobbly” rim is “out-of-true”.  To repair an out-of-true wheel you take it to a shop to be “trued”.  Wheel truing is an art best performed by an experienced mechanic and when well done improves the life-span and performance of  your wheels.
Dish: Term used to describe a rim’s alignment to the centerline of the wheel.  A rim that is centered is “in dish”.  A rim that is of center is “out of dish”. To repair an out of dish wheel you take it to a shop to be “dished”.  This is an integral part of building any wheel.  Wheel dishing is not to be taken lightly and should only be performed by a professional mechanic with a specialty in wheels and wheel building.
Round: Term used to describe a rim’s circular alignment with the center of the hub.  A rim that is perfectly circular is “in round”.  A rim that is not circular is “out of round”.  This is an integral part of building any wheel.  A wheel that is out of round is best addressed by a professional mechanic with a specialty in wheels and wheel building.
Bottom Bracket (BB): The assembly housing the set of bearings and often the spindle (axle) that the cranks turn on.
Headset: The assembly housing the set of bearings used to control the steering of the bicycle.  Found at the front of the bike and housed in the head tube.  There are many varieties, sizes, and standards of headsets – not all are interchangeable.
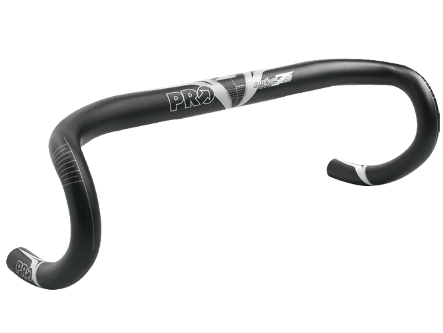
31.8: Oversized handlebar standard quickly becoming the norm.  The number refers to the diameter in millimeters.  It’s oversized nature is realized when compared to the older standards of 22.2, 25.4 and 25.8 or 26.0.  31.8 quickly became popular with stem manufacturers because it eliminated the difference between mountain and road handlebar diameters allowing them to potentially make fewer stems.  This standard is commonly stiffer and stronger than it’s smaller counterparts but can often be heavier.
SPD: Shimano Pedaling Dynamics.  Term used to identify Shimano’s system of clipless pedals and often as an umbrella term for clipless pedals in general.  The SPD system currently comes in two varieties: SPD-M for mountain biking and touring and SPD-SL for road cycling.  The SPD-M system is also the most common for indoor cycling (spinning) classes at gyms and fitness-centers.
Clipless (pedals): Term used to describe pedal systems designed to mechanically engage with a shoe.  On the surface it appears to be a misnomer, as we refer to the engagement/disengagement process as “clipping-in/clipping-out”, however due to the fact that the predecessors were called “toe-clips” and these do not employ the same attachment methods of clips and straps, these came to be known as “clipless” pedals.  Common systems (and umbrella terms) are SPD and LOOK, but these are available from a myriad of companies. Not all are interchangeable.
Quick Release (QR): A type of fastener which usually replaces a nut or bolt and uses a cam-style lever to secure an item to the bike without the use of tools.  On modern bicycles these are most commonly found securing the front and rear wheels to the frame via the hub axle and occasionally used to secure the seat post in the frame.  Fun fact: the hub quick release was invented by Tullio Campagnolo, the namesake of the Italian bicycle component manufacturer.
Chamois: Traditional name for the padding found in cycling shorts. The padding originated as soft, refined leather sewn inside the shorts – thus the name “chamois”; but has been replaced in most cases by thicker, multi-density, synthetic padding.
Computer (“cyclometer”): An electronic device used to track various elements of a ride such as speed and distance.  Usually this is achieved via a magnet attached to a wheel, a sensor mounted on the frame and a computer unit which receives signals from the sensor and is calibrated with the approximate circumference of the wheel.  Using this method, the computer knows how far the wheel has traveled each rotation and how long it took to cover the distance. Additional features may be (but are not limited to) average speed, maximum speed, riding time, cadence (RPM of the cranks), and even altitude and heart rate on some models.  GPS (Global Positioning System) computers are also becoming more common and triangulate your position using a satellite system to provide similar results.
Saddle: Technical term for a bike’s seat.
Freewheel (noun): A single cog or cluster of cogs (gears) on the rear wheel which allows the rider to “coast” or “freewheel” while the wheel is still spinning. The multi-cog freewheels allow for the chain to be shifted among them in order to achieve different gear ratios and mechanical advantages.  The Freewheel is characterized by the way it attaches to the wheel’s hub.  A freewheel screws onto the hub via a threaded interface with the hub itself.  The bearings and “ratchet and pawl” mechanism inside a freewheel are what made it such a huge advantage over the fixed cogs which were the norm and required the rider to continuously pedal if the wheels were turning.
Freewheel (verb): Term used more commonly in European cycling circles for “coasting” or riding without pedaling.
Cassette: A single cog or cluster of cogs (gears) on the rear wheel with similar advantages to the freewheel, but differing in how it attaches to the rear wheel’s hub.  In a cassette mechanism the bearings and ratchet and pawl mechanisms are housed inside a part of the rear hub (often referred to as the freehub).  The cassette itself is just a collection of cogs which are designed to slide onto a splined interface with the freehub portion of the rear hub.  These splines are intricate and occasionally proprietary interfaces which are commonly brand specific and may only allow for certain brands or certain numbers of cogs to be compatible.  The multi-speed cassette rear hub is considered superior to the freewheel in terms of durability and strength and are most commonly found on higher-quality component configurations.

Departure from Sunset Cycles

There are many who read this blog who are regular customers of mine.  Some of you I have been able to contact; others I have not.  For those of you who do not already know – here is the latest as I do not want anyone to be surprised:

 Last Thursday night, June 16; Roger laid me off from my job at Sunset Cycles.  Reasons cited were 1) failure to follow through on small, around-the-store tasks such as cleaning and 2) Refusal to work on Sundays more than the occasional instance I had originally agreed to.


While both of these are true, I believe that those who know me well will agree that there are many bigger, more valuable tasks – providing superior customer service among the biggest – that I performed with absolute consistency.  Additionally, Sunday is a special day to me as it is my only weekend day that I spend with my family – who are the most important people in the world to me – as we go to church and do other important family activities and I will always refuse to put work ahead of my family if forced to make a choice.

I am not looking for sympathy and I don’t expect you to defend me to anyone at Sunset Cycles. Neither do I intend to influence where you choose to do business in the future. I simply wanted my side of the story to be told to those who are important to me and for you to not be surprised when you visit the store.

Additionally; I feel that we have a long-standing relationship as it pertains to your cycling life and I want you know that you are free to contact me with questions and for advice.

As for the future; I don’t know if I will be returning to the retail side of the bike industry again. But if I do; I will certainly announce it here.

Best wishes.  I hope to bump into you on the road – as I plan to do more riding now – and I hope that I can be of service in the future. I am open to helping you with your bikes at least in the short term with the understanding that my resources are a little limited at the moment. 
Continue reading “Departure from Sunset Cycles”

Fascinating Article on Tire Testing

Part of a series I’m calling Tires 101 with lots of great info to consider when looking for new tires.

CHOICES, CHOICES…
Our choices in the tires we ride are possibly among the most subjective we make. There is often very little empirical data (except maybe price…) that is involved. More commonly our “data” is along the lines of “my buddy says they’re the fastest tires he’s ridden” or “she said she didn’t get flat tires for a year”. When you really stop and think about it though – there is a lot of highly personal variables involved in those statements. Let’s cut through the clutter.

I’ve long admired cyclingnews.com’s James Huang’s technical writing and referred to it often as the best in cycling journalism (although – VeloNews has really stepped it up lately).

tire-test

One of his latest pieces highlights a tire testing facility in Finland that seems to finally be coming up with some good data on tires in real-world type scenarios and less-so in the controlled laboratory conditions of older tests. The article has some fascinating facts and data; confirming some long-held thoughts and theories of my own and surprising me on a few areas that I had accepted as fact which it seems were not.

FIRST – THE CONFIRMATIONS:
-Wider tires are faster due to less energy lost in casing deformation. The study specifically cites 25 mm tires versus 23mm tires.

-Puncture resistant tires are typically slower, but to different degrees depending upon the stiffness of the material used. Again, based on tire deflection.

-Lighter inner tubes are faster. Lower weight at the periphery of the wheel lessens the moment of inertia and amount of effort required to maintain speed – the same as with lighter tires. Continue reading “Fascinating Article on Tire Testing”

How to fit a Cyclocross Bike

JUST A LITTLE DIFFERENT FROM MY OTHER BIKE…

As I have discussed (at length) before – there is a lot of good and bad info out there about bike fitting and selecting the right size frame. One of the more common topics I run into this time of year is how to select the right size of Cyclocross bike.

A common guideline I have heard is that you ought to size-down from your road bike frame size to obtain the right ‘cross frame. As a universal guideline, this couldn’t be more WRONG! There are instances where this may apply, but I would say that they are rare now. It is a unique bike and just like you wouldn’t adjust your road bike a “little different from your road bike”; treat your cyclocross bike like and individual and get it right.

b_cyclocross1

A BRIEF HISTORY OF THE BICYCLE…

To explain my stance – first a little history. In the (seemingly) long-gone days of “traditional” (horizontal top tube) geometry, one of the big differences between a road frame and a ‘cross frame was a higher bottom bracket shell (where the cranks pass through the frame) to allow for clearance over obstacles and terrain.

Depending on what road frame geometry you were comparing this to (criterium, stage race, touring, etc…) this could result in a bottom bracket that is 10, 15, or 20mm higher on a ‘cross frame than the comparable road frame. Therefore, to get the same top tube length for proper fit, you would subtract that 10, 15, or 20mm from the road frame’s height to arrive at your ‘cross frame size. For example, I fit nicely on a lot of “traditional” 58cm and 59 cm frames. So, I would ride a 56 or 57cm ‘cross frame from the same manufacturer (if it had a higher bottom bracket) to get the same extension to the handlebars.

Since then, a few things have changed. (o.k., a lot of things – but only a few in the world of bike geometry.) But these few items may have a large effect on what frame size you ride.

  • Sloping top tubes and taller head tubes have changed how we size and fit bikes
  • The same top-tube slope has introduced more variability into “numbered” frame sizing (i.e. 53, 54, 56, 59 cm, etc…) for road and cyclocross frames
  • Many frame builders have moved away from the “Euro” higher bottom bracket to a more “American” lower bottom bracket for cyclocross – although, not all of them.
  • Integrated headsets “inflate” head-tube dimensions and must be accounted for versus traditional “press-in” headsets when determining front-end height
Continue reading “How to fit a Cyclocross Bike”

Do I Need a Bike Fitting?

HOW DO I KNOW?

Driving around town the other day I saw so many people who were so obviously uncomfortable on their bikes (and suffering a loss of efficiency because of their lack of comfort along with other factors).  So, since so much of my material is inspired by my experiences – I was inspired to write another post: A few quick pointers on how to know if you need someone to assess your bike fit.

Several of the signs are pretty obvious: persistent knee pain being the most common.  But there are a few quick and easy signs that something is wrong that aren’t immediately apparent (or that some of you think you just have to live with).  Let’s start at the front of the bike and work our way back.

-Numb hands: Bike fitting can’t always eliminate this issue as sometimes there are some deeper things going on (poor circulation being an obvious one).  But, often this is a marker that something is wrong with your position and your hands are having to do too much of the work of supporting your torso.

bike-fitting

-Can’t comfortably use all or most of your handlebar: I see this one pretty often.  You paid for all of that handlebar, you might as well be able to use all of it that is possible!  All kinds of position errors can limit your access to your handlebar.  If you’re not able to reach all the different positions on the bar, you’re not getting the most out of your bike and not able to change positions enough to enhance your comfort.

-Poor handling characteristics or difficulty descending: There can be many causes to these symptoms ranging from the mechanical to the psychological.  But, a correct position on the bike is not only comfortable, but lets the bike work as it is designed because the rider’s weight is distributed properly.  Handlebar position, stem length, and saddle position can all contribute to fit related causes.

-Locked elbows: Usually mean your handlebar is in the wrong spot.  This makes your bike handle less predictably and often causes soreness in the elbows, shoulders, neck, and possibly elsewhere.  Your bar could be wrong in any direction though: High, low, too close or too far; so consult a pro.

-Sore neck or headaches after riding: Often also an indication of poor handlebar position requiring the rider to hold the head up too far or driving the shoulder blades together. Continue reading “Do I Need a Bike Fitting?”

Quick note: Bicycle Fitting “Apps”

First – don’t get me wrong.  I’m not a Luddite. I love many things that have come along in the technological revolution.  But, we still must be careful how much gravity we give these tools and applications that actively or passively claim to replace humans.

I’ve talked some about the bike fitting calculators which can be found at various locations online and how; while they may be based on good equations, there are two inherent flaws when it comes to claims of delivering “correct fit” or “correct frame size”:

bike-fitting-iphone-ipod-ipad-app

1. The accuracy of the resulting dimensions is only as good as the accuracy of the measurements used in the equations.  Garbage in, garbage out.

2. Unquantifiable factors such as injury history, desired riding position, physiological asymmetries, riding history and goals are not accounted for.  Additionally, flexibility and ranges of motion also weigh heavily into determining a rider’s optimal on the bike position.  These factors are glaringly absent from these applications because they introduce an “X” factor which cannot be caluclated. Continue reading “Quick note: Bicycle Fitting “Apps””

Bike Mistakes Series

Here for your easy browsing; an index of the posts I have created (and the planned posts for future publishing) on what has turned out to already be a popular topic. I hope you find all this helpful in making your bike more comfortable, run more smoothly, and last longer.

Have any suggestions? The comments section of this post is the place to leave them; so comment away!  But most importantly – enjoy.

Bike Mistakes – Part 1: Handlebar

This is the first in a series on common mistakes on your bike…

I’ve been thinking about a series of posts about common mistakes that most everyone (even some shops) makes on bicycles. I’m going to give this a stab here and see how it goes. I’ll be focusing on mechanical mistakes as well as those that may effect comfort, handling, or safety. I don’t know how many parts there will be – this will just sort of evolve. If you have a suggestion or something you’d like to see covered: leave a comment and let me know.

IN THE BEGINNING…

So, let’s start at the front of the bike – and with an important contact point: the handlebar.

This is the control center of your bicycle. Almost every control command; braking, shifting, and steering, must go through the bars in one way or another. Sure, there are other ways to control the bike by shifting weight and changing position on the bike – but when you really think about it; most of these maneuvers require some sort of interaction with the bars too. So, how do you set up your handlebars for maximum effectiveness? I’ll start with road drop-style bars and the move to flat and riser mountain-style bars.

bike-handler01First, some guidelines: Always use caution and NEVER do this while riding the bike. Preferably you will have the bike set in an indoor trainer for these steps for easy adjustment and self-evaluation. Always use a torque wrench set to manufacturer’s recommendations when tightening bolts – especially on carbon fiber and lightweight aluminum. This is implied any time I say to tighten the bolts. Any longer, nearly 99% of bolts on bicycles are metric. Use a metric wrench. If you are not certain about anything, consult with an experienced, professional mechanic.

And this article is by no means a substitute for a bike fitting or visit to the mechanic. This is meant to be a guide to help you identify some of the mistakes that may be present on your bike and give you a starting point to solve them. Consult with a professional for a solution to your unique problem. I mean, come on – you really expect me to solve your problem through a blog? 🙂 Continue reading “Bike Mistakes – Part 1: Handlebar”